Using Stencils as a Cheap Way to Beautify My Home!
We moved into our first house in January of this year, and since then, I have been on a DIY rampage along with the help from Tulip For Your Home. I have been collecting all of the ideas and inspiration on my Home Transformation Pinterest board and one idea has become clear: Stenciling has become all the rage, and I love it!
")
Several months ago, I ordered a couple of stencils off of Amazon with a few stenciling ideas in mind. I didn’t really know what I was doing, and didn’t have the proper equipment. It was a total failure and the bookcase upon which I was stenciling, ended up repainted and now is just white.
I had given up on stenciling as I thought that all those tutorial I had seen must be photo-shopped or else done by an expert. I didn’t think someone like me – a stenciling beginning – a creative person with zero artistic ability – would be able to duplicate beautiful results.
Enter: Tulip For Your Home. Tulip has an all new line of stencils and paints that are designed for home decor projects! I was still totally skeptical, but when Tulip offered to send me a bundle of their home decor items to try out, I couldn’t resist at least trying it out. And so, I headed to I Love to Create and picked out the colors and stencils from their home decor that I wanted.
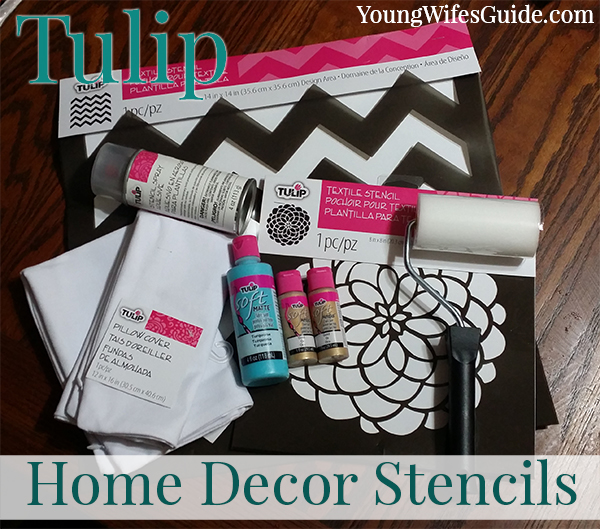
The Tools
I am so happy with my results with these stencils and I know the materials I got were the key! I never would have spent a few extra dollars on a can of stencil adhesive and I’m confident that’s what made all the difference between this successful DIY project and my disastrous first attempt.
- 14” x 14” large chevron stencil
- 8” flower stencil
- Sea blue Tulip Soft Paint
- Gold glitter Tulip Soft Paint
- Stencil Spray
- Roller
- Tulip Home Decor Pillow Cases (2)
- Old beat up side table (Goodwill)

Step by Step Tutorial
1) Paint or Prep Your Items
My first step was to get my ugly cabinet ready for stenciling! This means I removed all the hardware, and applied 2 coats of this off white/cream paint. I then painted part of the door and the bottom piece with this bright blue.
2) Position Your Stencil with Adhesive Spray
I consider this step to be the most crucial. Like I said before, I skipped this step on my first stencil project, and the paint leaked under the stencil and made one big, ugly mess!
So take the time, and the few extra dollars, to invest in adhesive spray. Make sure to spray down the matte (NOT the glossy) side of your stencil and get all corners and edges well covered. Lay your stencil down and smooth out all the lines to ensure that your stencil is properly bonded to your project!

3) The Fun Part – Start Painting
Using a foam roller is also another key to stenciling like a pro! Foam rollers hold a TON of paint at once but it allows coverage that is light and even. Load your foam roller with a good amount of paint and start applying thin, even layers. I had to do two layers to cover effectively.

4) Covering a Large Area
If you are working with a larger area, it might be necessary to move the stencil and continue the patter. After the first part, I let the stencil sit wet for just a minute and then I carefully peeled up the stencil from the wet paint. Note: Do not let the stencil dry with the paint…when you try to take it off later, it will probably take the paint on your project off too!
Once you’ve removed the stencil. Let the original paint dry completely before adding the second part of the stencil if you will need to overlap the stencil and the wet paint.

5) Now that you are a pro – Start stenciling everything!
While I had all the paints and stencils out – I let the stencil dry and then decided to stencil two throw pillows for our living room. Stenciling on the canvas pillow cases was actually much easier than my DIY painted cabinet. I plan on doing many more pillows for my house as each pillow only took about 5 minutes!

Where to Buy
You can head to your local craft store, such as Joanne’s or Hobby Lobby, or head over to I Love to Create and pick out all of your stenciling goods!! You can also follow them on Facebook and Twitter for all the latest news and updates. And most importantly – Follow them on Pinterest for all their latest projects, ideas, and inspiration!!
Disclosure: This post was written as a sponsored post for Tulip For Your Home. All opinions and thoughts are my own.